Thursday, October 27, 2011

The Painted Quilt

     I have to apologize for taking so long to follow up on this project.  The painting took me two days to complete, and since then I've been trying to force myself to do the quilting.  I hate the quilting process.  I finally decided I wasn't in the mood for quilting it,(I have at least 6 completed tops in this stage) and decided it was time to post the instructions.  I truly admire applique quilts, but don't have the patience to complete one, especially since I don't like them machine sewn.Hence, the painted quilt.

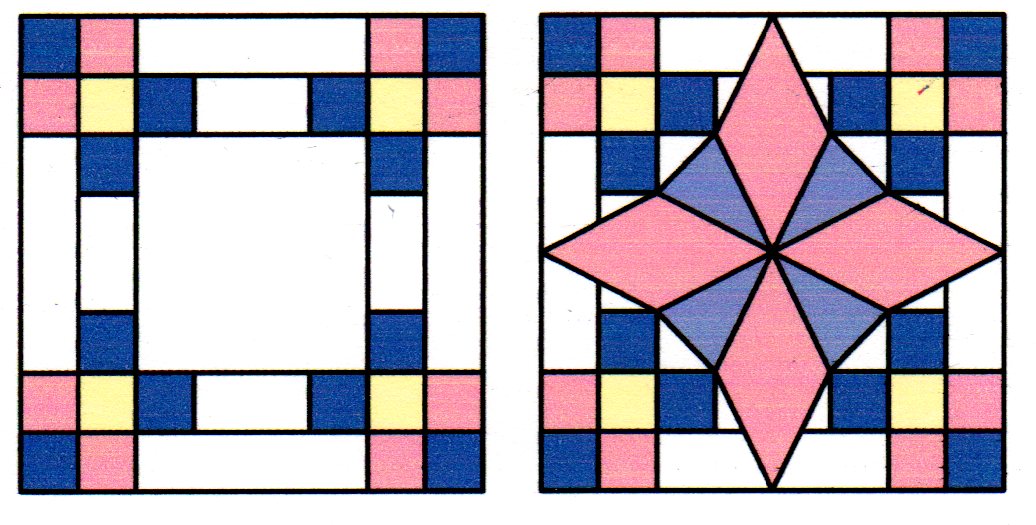
      I chose Nancy Cabot patterns for this.  I only had 12 designs, so I scaled them to a 14" block. To me, a quilt is something to sleep under and with a 14" block, it could be used as a single or a lap quilt.   If I were to do it again, I'd stay with a 12" block


Materials:  Background fabric cut to block size plus seam allowance
                 Acrylic Paints
                 Textile Medium
                 Assorted brushes, I found that flat brushes worked best
                 Newspapers

          .  I prefer the Ceramcoat brand of acrylic paints, but any kind will do.  The Textile Medium is not absolutely necessary, but it does give an even, free flowing consistency to the paint.  The beauty of this method is that you can paint the blocks in solid colors, or you can shade  and over paint to form patterns that resemble fabric.

      Transfer the designs to the background blocks.  Place the block on a pad of newspaper.  The paint will bleed through and leave paint on the paper, so be careful if you move the block or you will pick up any wet paint from the paper.  Upon completion of the block, remove it from the paper immediately to keep it from sticking to the block..

      Squeeze the paint onto a palette, (I use a plastic throwaway  plate)  Add enough textile medium  1 part medium to 2 parts \paint, or until you have a smooth consistency that's not too thin.  Fill flat brush thoroughly with paint.  If desired dip one edge into shading color and work brush slightly to blend colors.  Apply to design. 

      Remove block from paper and spread out to dry on a plastic bag.  Allow to dry 8-4 hours.  Heat set with medium temperature iron.  The blocks can be washed at this point if desired.

Monday, August 15, 2011

Patterns

     I've been sorting patterns.  Most of the patchwork designs have been organized and I've finished my book on ther Kansas City Star designs.  Now I'm working on Nancy Page designs.  Below is a sample of the patterns Nancy Page contributed to the newspaper column in the 1930's.

                              
     I am also sorting all the applique designs.  In the process I came across some Nancy Cabot patterns.  I find applique boring so I decided to paint the patterns.  I'll show you the results in my next post along with the patterns and how to do it.  Till next time, good wishes and happy quilting.  Maggie

Monday, July 11, 2011

Getting Creative

I've always liked playing with patterns and I'm showng the results of one of my play sessions.  The pattern is Beautiful Star.


This shows the effect of just changing the colors within the design.

In the following designs I added a frame around the star:


In the next examples I added different elements to the basic design


In the final example I laid the star over another design


 See how easy it is to create your own designs?

I wanted to mention two blogs that I thouroughly enjoyed,
quiltsetcetera and whiteomorncottage.  They are both entertaining and informative although since whiteomorn is from Ireland it doesn't deal as much with quilts, but the history given is outstanding.


Saturday, July 9, 2011

Herbs and Spices

     Last weekend I attended a bridal shower for my granddaughter Beth ann.  The theme was stocking the kitchen to cut down on sticker shock for the newlyweds.  I thought this was a fantastic idea. I elected to stock her up on herbs and spices.  You know how expensive they are.   I bought 12 spices and since they had already purchased a home, I added 3 live herb plants, chives, thyme and rosemary.  In no time at all she will have ample amounts of these herbs to use.

     I did luck out on buy the herbs.  I was in search of a sage plant, which after visiting four different stores I never did find, but my last stop was at a local Marc's store.  I found a huge assortment of dried herbs and spices at the unbelievable pice of $1 to $1.50 for a 4 oz. bottle.  Sure beats the usual price of $3.50 to $7 for a 2 oz. bottle of name brand spices.

     I live in an apartment, but have a 3' wide space along the building in which I plant various things.  Three years ago I  planted a single thyme plant and it now covers a 2'x3' space.  I've been giving away parts of the plant to neighbors.  But in late summer I cut the stems, bunch them up and dry them for winter use. I've also planted sage and marjoram as well as copious amounts of  basil.  I love pesto and this is the most economical way to get a good supply.  My daughter in California has a lovely balcony and we were discussing how she could plant various herbs on her balcony.   It takes only a small amount of space to keep yourself supplied with fresh herbs all year long.

     I've finally finished my first self-published book, "Kansas City
Revisited".  I consider this an homage to the many quilters who kept the art alive throughout what I consider the "Dark Age" of quilting after World War II.  That's when store bought became better than handmade.  I've compiled all the patterns that were published between 1928 and 1960 (not including series patterns) into one volume.  It includes the date or dates published as well as the woman contributing the pattern.  Where possible I've given the size recommended as well as suggested colors.  I'll let you know when it is available.

Tuesday, July 5, 2011

Scrap Quilts

     When I first started quilting, I thought scrap quilts were the ugliest things around.  They were just a hodgepodge of fabrics with no discernable design.  As my stash of scraps grew, I explored the possibilities of scrap quilts and found that if I used a single, unifying color throughout, they looked pretty good.  My first attempt was a Sawtooth, which I thought looked pretty good. 

This quilt has long since disintegrated and I am now completng a new one.  My second one was Double Pyramid.  Hey, there were only 9 blocks to be pieced and lots of white space.  This is the quilt where I learned the meaning of the phrase "it's not a quilt until it's quilted.  Once I set the blocks together, it was a really blah quilt.  Then I quilted it with feather wreaths and it was gorgeous.  This was my all time favorite quilts, but sadly, it too disintegrated. 


     As I examined my quilts, I found that the all cotton fabrics didn't hold up too well.  I had some quilts with poly-cotton patches that were just as bright as the day I put them in, but the cotton just shredded and disappeared.  All of my quilts show this deterioration and I really wish I could find poly-cotton prints again. 

     By this time I have become addicted to scrap quilts.  As I got into them, I realized that you need a of scraps to work from so I began cutting a 3" or 4" strip off any new fabric I bought and adding it to my scrap stash.  This size allows me to cut squares, strips and half-square triangles to fit my most used size block.  I also cut up any scraps from a planned quilt to go into my scrap boxes.  And I kept finding uses for smaller and smaller pieces.  The pieces for this block are 1" by 1-3/4" finished.  I can't remember the name of this pattern, but the hexgon shaped one is Jack's Chain, and it uses strips 1" x 2".


Wednesday, June 29, 2011

Daydreaming

     I am going off topic today  because I've been thinking of my youngest son, J.R.  He is 24 yers old and is serving a 10 year prison term.  I visit him once a week and he calls a couple times, but he sent me the following letter and even though it is a prison setting, I thought of all our servicemen and women, as well as anyone who is away from home.  Hope you enjoy it.

                                   A Letter
     You never will know what a letter can mean,
Until you've been where I've been and seen what I've seen
     I'm confined to a world behind four brick walls,
Where no one can see me and where no one can call
     Often I sleep but I awake alarmed,
Worried that my loved ones or friends have been harmed.
     Thank God it's just a dream, as I come to my senses,
I look out the window but still I see barbwire fences.
     Somehow I keep making it through the day
Awaiting the mail call, but nothing for me they always say
     Not a letter, a note, or even a card
When nobody writes times really seem hard
     Just a line or two to say everything is fine,
Just a few small words to ease my mind,
     Kind words, well wishes, knowing you're there,
Anything at all to show me you care.
     You never will know what a letter can mean,
Until you've been where I've been and seen what I've seen.
                                                   Joseph R. London
    

Friday, June 24, 2011

Sew it Faster

      I've never figured out why quiltmaker' s insisted on making the sewing more difficult than it had to be.  My favorite example of this is the Cheese Box.

The piecing instructions for this were given as follows:

If you lay a grid ove the pattern you will find a 5-patch block which can be easily pieced using squares and half square triangles.

The pattern Attic Window provides  real "duh" moment.  This is considered to be a very easy pattern to piece, but you must sew a set-in seam in the lower left corner.  Check it out with a grid laid over the pattern.

One more example.  This pattern is called Rainbow Flower. 
The original design is on the left,  Piecing it as shown means you have to set in that diagonal seam throughout the block.  But, if you piece it as you would a Log Cabin, you can have all straight seams.  Quilt it following the original design and the seams will fade into the background.


Thursday, June 23, 2011

     I spent Mother's Day with my daughter in California.  Since I don't fly, I took the bus from Ohio to California.  What a nightmare.  Never again.  Cramped seating and rude drivers were only the beginning.  I didn't know you had to bring your own food if you wanted to eat.  The few terminals we stopped at had only vending machines with chips and candy bars.  Most stops there was nothing available.  One stop was at a country crossroads with only a barn in sight. 

     Anyway, the visit was pleasant.  My daughter has been trying to talk me into moving there, but I don't see that happening.  I really wasn't impressed with the L.A. area.  

     I was there over Mother's Day, and my grandson Nathan, who is 8, gave his mother a decorated bag filled with items he had made in school.  I thought the drawing was so cute, I decided to make a small wallhanging of it.  My daughter scanned it into her computer then e-mailed it to me.  I transferred it to my graphics program for resizing and  divided it into four sections, then printed it onto those Cotton sheets made for inkjet printing.  Ain't modern technology wonderful?  I think it turned out pretty well.  Since this one turned out to be pretty easy to do, I guess I'll start on the one for my oldest daughter.  Unfortunately, she wants one 5 foot by 5 foot.

Saturday, June 11, 2011

Maggie Malone's Quick Quilts

     My favorite part of quilting is playing with patterns to make them easier to piece, as well as designing new patterns.  Below is my latest one which I called Rainbow.
                     

     My original design featured large white rectangles which provide a lot of room for quilting.  But since quilting is my least favorite part of the process so I opted to make colored strips to break up the plain white.  This let me do stitch in the ditch quilting.  This a a large 24" block so it works up quickly.
 
    
 I like a lot of color, but if you don't, you could use just one. 

     The next one I am really proud of.  I was so taken with the Wheel of Fortune design, but when I realized each block contained 32 pieces, I had to think about it.  


     By combining the pattern pieces, I was able to cut the number to 16, and they were strip pieced before cutting.  I completed 25 blocks in 12 hours.  Now that's a time saver.

     I am a packrat.  I find it very difficult to throw away anything that I might sometime in the distant future, find a use for.  This began with my children's clothing, from the time they were born up until they moved out.  Now you know that kids don't usually wear out clothing, they outgrow it.  This is all perfectly good fabric and how can I possibly throw it away?  After the clothes consumed a 3'x10' closet, and trash bags were all over the house, I knew it was time to do something with them.  So, I started a book I'm calling "101 Uses for Old Clothing".  I may not make it to one hundred, but I am up to 50.  Below is a sample rug I made from old sweatshirts.  Some of these do get raggedy, but there is still lots of good fabric to be had.


     I think this is a good use for old sweatshirts.

     My current downfall is the plastic bags every stores packs your purchases in.  I am again losing a closet, so I decided I needed another rug, this one crocheted.  I cut the bags into strips and used the strips as yarn.


     I used a contrasting color to lace through the mesh for four rows just to see how it would look.  I did one similar to this for the above mentioned book using yarn as the mesh, but then threaded fabric strips through the mesh running the strips lengthwise over the whole surface and leaving a fringe at each end.

     I am currently working on a shopping  bag from the plastic bags.  I'll post a picture when I complete it.